
Wednesday, February 13, 2013
Laminated Prop
Simulated laminated prop...sanded off the varnish of a Xoar prop, then hand painted the darker color with wood stain.
Friday, February 8, 2013
Monday, January 21, 2013
Finished and Flown!

This morning promised to be another calm day so I took her out again and flew the maiden flight. It was horrifically nerve-wracking but she flew very nicely. Just required some up trim on the elevator and a couple clicks on the ailerons to get her flying straight. Half throttle is about all that's needed to cruise; I guessed the Eflite power 46 motor was probably overkill - but better safe than sorry!
Performed three very nice, clean landings and then called it a day. I didn't have the guts to keep flying for fear of smashing her to smithereens on the first day ;) Only damage was my fancy working tail-strake that I designed (not stock for the plane), but I expected it to be the first thing to break. I'll have to reinforce it.
The plane is a bit heavier than I'd hoped at ~ 5 lbs 4oz. Aerodrome RC claims the flying weight should be 4lbs 10oz. I'm not too far off and have a bigger motor, esc, and battery than is probably necessary, but I also added a bunch of lead weight (6oz) to the nose b/c the CG was a little farther back than I was comfortable with, at least for the first flight. I'll try removing some of that nose weight next time to see if it's really needed.
Ok here are a bunch of pics I've taken over the past month at various stage of the build. I skipped over all the wing covering steps, painting, landing gear design, etc.

This is the nose cone being made. I made a hot-wire cutter in the proper shape using some music wire and mounted it to a wood jig. Then I took a block of styrofoam and rotated it while the hotwire cutter was on to cut out the basic nose cone shape. After this image, I sanded the foam, then fiberglassed it with several coats of fiberglass & epoxy resin.

Painting the engine bay area (Rustoleum grey automotive primer)

Taped taken off the engine bay after painting

close-up of engine

Plane is finished!

At the field, just prior to the maiden flight

Just after the maiden flight...note the wetness on the wings...it was fairly foggy that morning.
I'll be sure to bring my video camera next time I fly and will post that too.
Monday, October 22, 2012
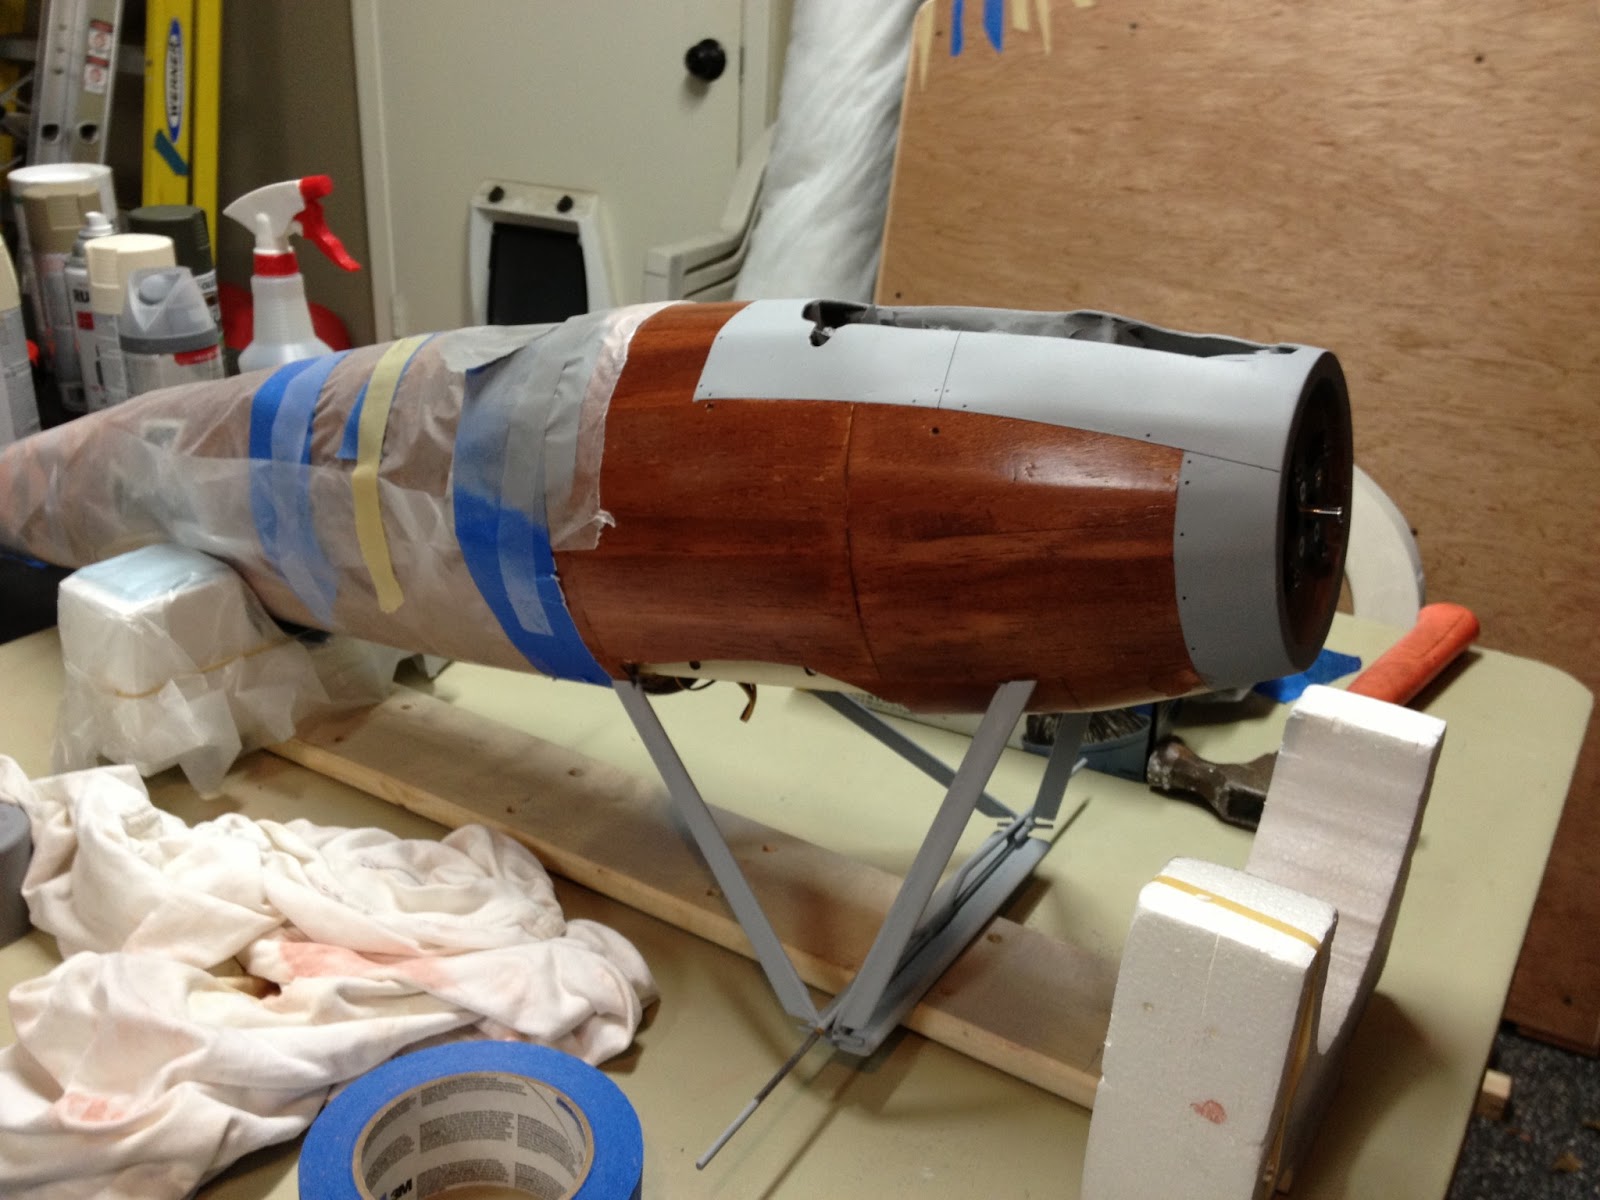
Fuselage stained and first coat of poly!
After trying about 50 different combinations of stain/poly/thinner I finally settled on a darker color for the fuselage. The light yellow color of most of the natural-wood planes was too difficult for me to replicate in balsa, so I went with a darker reddish color as portrayed in the picture below of Albatross D.Va 7177.17 - Cpl. A. Bartkowiak's plane.

I found that Minwax Red Mahogany replicated this color fairly well. After applying a wood conditioner and staining the fuselage, I found the result to be a bit more splotchy than I had hoped, but it looks really good regardless! I also had to go over all the spots where CA had been applied with a brown sharpie because the CA apparently seals the wood and doesn't allow the stain to penetrate (leaving very light patches).
Below is a picture of the fuselage after the first coat of polyurethane tonight:
I have the fuselage set up in a rotating drying rig (powered by some old Lego gears and a motor) to keep the poly from pooling on any one side. Close up of the rotating mechanism below:
I plan to put on three coats of the poly with sanding in between, and will do the cutouts for the cockpit and motor prior to the last coat.
And a very exciting video of paint drying: (I know, it's not paint, but close enough). Maybe next time I'll post a video of grass growing ;)
Wednesday, October 10, 2012
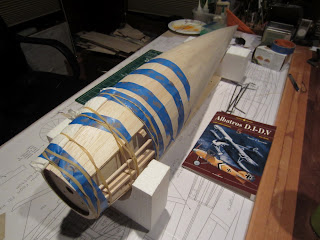
Fuselage is fully sheeted
Finished sheeting the fuselage tonight. It looks really nice so far. I'll have to sand down the uneven edges and fill the gaps. I've built a test sheet, glued to a frame of pieces similar to the stringers in the fuse, to test the staining and/or clear coats for color, finish, and to see if they will warp the sheeting. I'll also have to test wood-fillers for color after the stain/clear coats.
Below is the top view of the sheeted fuselage:

And the bottom view with the battery hatch off (it's sitting upside down on the table below the fuse)

Here's a view from inside the fuse, looking astern from the battery hatch. The elevator and rudder servos can be seen (the ship was upside down when I took this), as well as the battery lines to the ESC.

And another view inside. This is looking astern as well, but from the front of the plane, looking through the motor shaft hole in the firewall. The three esc-to-motor wires can be seen, as well as the Castle Creations 75amp ESC. The battery trays sits below (above in this picure) the ESC tray.

Next up is figuring how to do the stain/clear coats. I plan to test the following:
- minwax stain + polycrylic clear coat
- polycrylic clear coat alone
- "coffee" stain + polycrylic (I read about staining balsa w/ instant coffee mixed with water...thought I'd try it)
- fiberglass + polycrylic (I'm interested to see how "visible" the fiberglass after it's put down with the clear coat, may be useful to reinforce some parts of the sheeting if necessary.
- test all of the above with & without sanding sealer.
I may also try premixing the polycrylic with stain or coloring of some sort to give the right look.
Below is the top view of the sheeted fuselage:
And the bottom view with the battery hatch off (it's sitting upside down on the table below the fuse)
Here's a view from inside the fuse, looking astern from the battery hatch. The elevator and rudder servos can be seen (the ship was upside down when I took this), as well as the battery lines to the ESC.
And another view inside. This is looking astern as well, but from the front of the plane, looking through the motor shaft hole in the firewall. The three esc-to-motor wires can be seen, as well as the Castle Creations 75amp ESC. The battery trays sits below (above in this picure) the ESC tray.
Next up is figuring how to do the stain/clear coats. I plan to test the following:
- minwax stain + polycrylic clear coat
- polycrylic clear coat alone
- "coffee" stain + polycrylic (I read about staining balsa w/ instant coffee mixed with water...thought I'd try it)
- fiberglass + polycrylic (I'm interested to see how "visible" the fiberglass after it's put down with the clear coat, may be useful to reinforce some parts of the sheeting if necessary.
- test all of the above with & without sanding sealer.
I may also try premixing the polycrylic with stain or coloring of some sort to give the right look.
Thursday, September 27, 2012
Sheeting the fuselage
Haven't posted in awhile, but have made some good progress on sheeting the fuselage. Have it about 80% covered, just have ~4 more panels to do at the front. Realized I needed to complete the sheeting before I started soldering the landing gear and cabane struts together since I'm not sure those will come on/off easily after being connected.
Here are a few pics of the sheeted fuselage so far: I'm using painter's tape and rubber bands to hold panels in place while the glue dries. I can do 1-2 panels a day, there are a total of ~18 on the entire fuselage.
 I've been soaking the panels in hot tap water for a few minutes to soften them up (it's 1/16" balsa sheets) and then I tape/rubber band the wet panel to the fuselage overnight to set the curvature. Then the next evening I'll glue it on and let that dry overnight.
 There's definitely some art to this and I've gotten a little better along the way. (so the front of the fuselage is likely to look a lot better than the rear!).
 I'll have to next sand all the edges flush & fill in gaps with some sort of putty...but I'm not sure what to use since most of the fuse will be just stained and clear-coated to give the natural wood finish..don't want the putty fills to stand out.
I also have been playing around with techniques for soldering the 1/8" music wire pieces of the landing gear together. I first tried a propane plumber's torch but it overheated the wire way too fast and turned it black, at which point I couldn't get the solder to wet. (I am wrapping with copper wire first) I then tried my higher-power electrical soldering iron and it seemed to work quite well...as long as all the metal was very clean, grease-free, and fluxed appropriately, and I didn't overheat it. I'll post some pics of the soldered landing gear once they're done.
Here are a few pics of the sheeted fuselage so far: I'm using painter's tape and rubber bands to hold panels in place while the glue dries. I can do 1-2 panels a day, there are a total of ~18 on the entire fuselage.


I also have been playing around with techniques for soldering the 1/8" music wire pieces of the landing gear together. I first tried a propane plumber's torch but it overheated the wire way too fast and turned it black, at which point I couldn't get the solder to wet. (I am wrapping with copper wire first) I then tried my higher-power electrical soldering iron and it seemed to work quite well...as long as all the metal was very clean, grease-free, and fluxed appropriately, and I didn't overheat it. I'll post some pics of the soldered landing gear once they're done.
Sunday, September 2, 2012
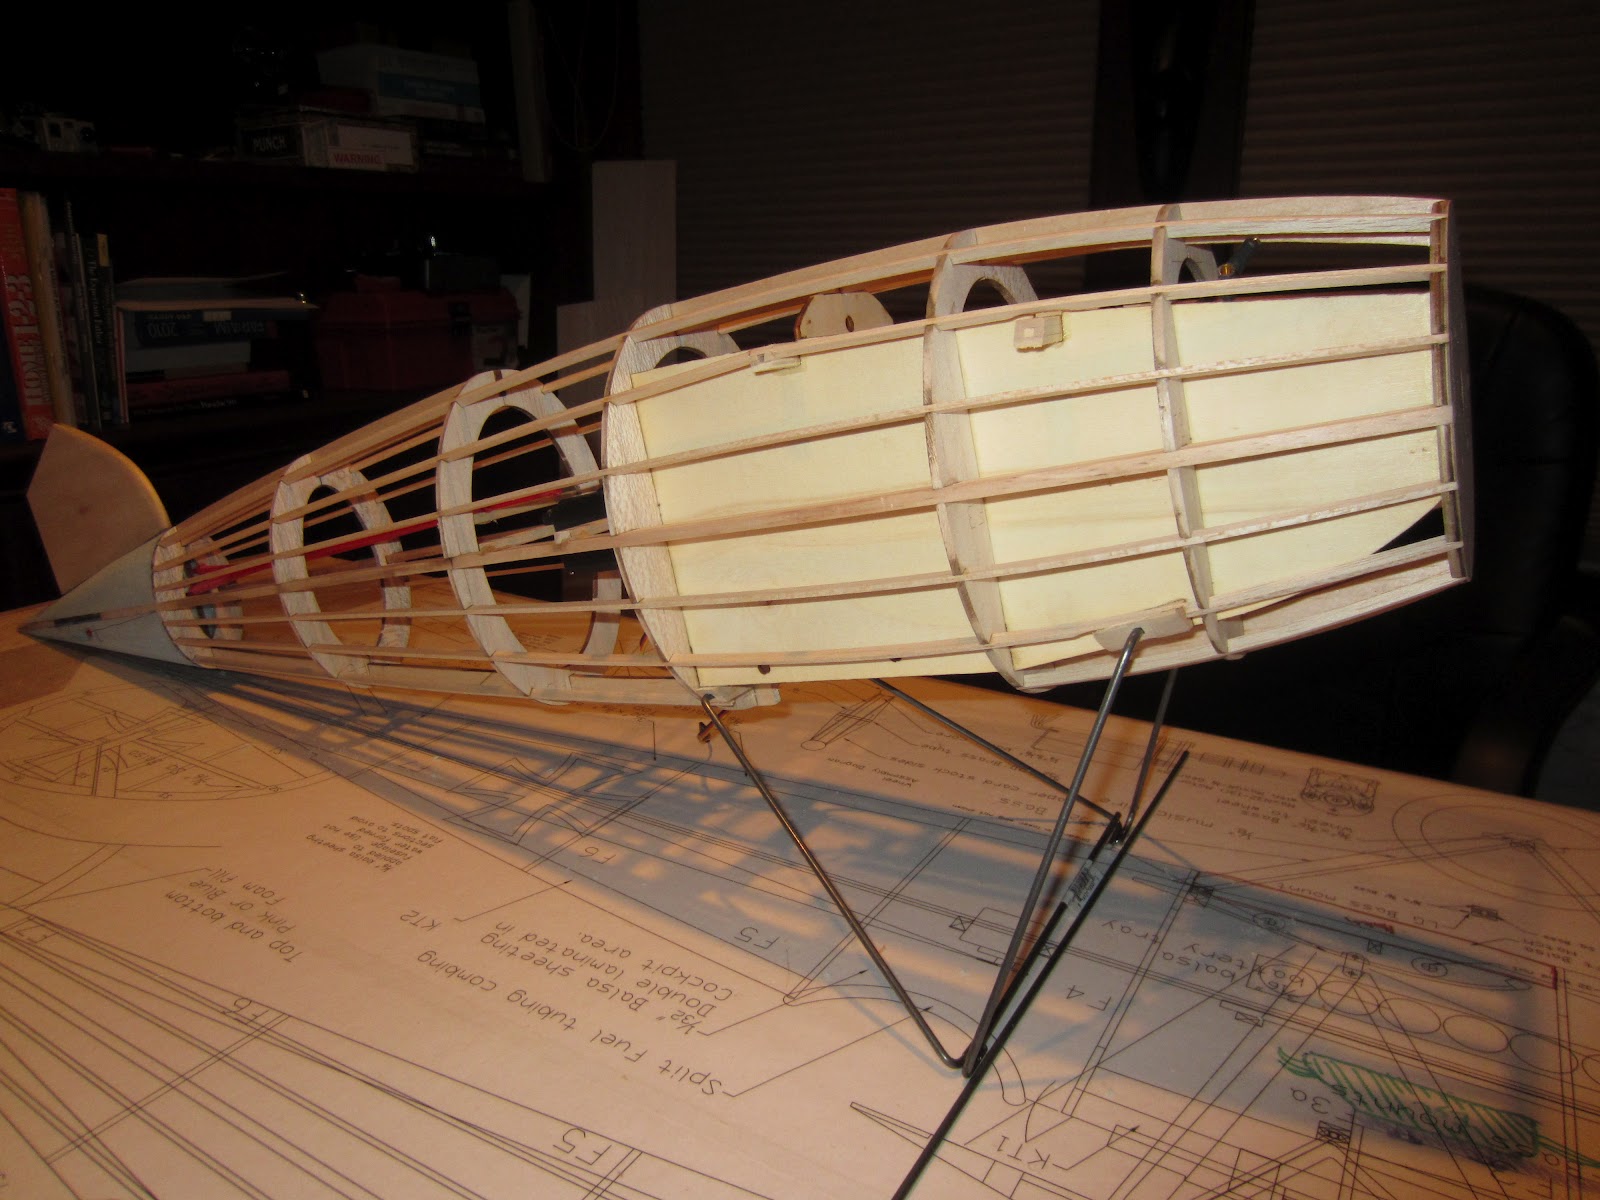
Landing Gear
Added control rods for the rudder and elevator last week, and then skipped to the landing gear. Landing gear are made from 1/8" music wire, five separate pieces bent to shape. Here are a couple pics of the gear before I've soldered all the parts together.

Subscribe to:
Comments (Atom)